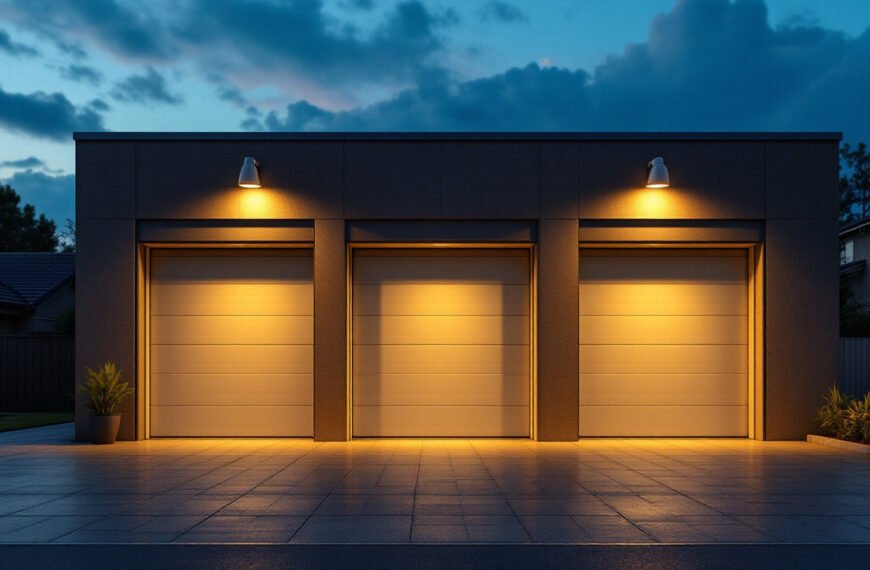
Adding a lantern roof to a home is one of the most effective ways to brighten an interior and create an impressive focal point. Although this type of glazing is most commonly installed on flat roofs, there is growing interest in placing a roof lantern on pitched roof structures as well. When planned correctly, this approach gives homeowners the chance to enjoy design benefits that are both visually striking and functionally valuable.
With high quality systems from brands like Skylights Roof Lanterns, it has become easier to install a roof lantern on pitched roof layouts without compromising insulation, strength, or style. Whether you are transforming a kitchen, upgrading a loft conversion, or enhancing a living area, adding roof glazing to a sloped roofline can make a dramatic difference.
This guide offers clear architectural tips to help you safely and beautifully incorporate a roof lantern on pitched roof surfaces.
Why Lantern Roofs Work Well on Angled Roof Structures
Many homeowners assume that lantern glazing only suits flat roofs, yet using a roof lantern on pitched roof designs can be even more impactful. Here are some advantages.
1. More Natural Daylight
A roof lantern on pitched roof layouts captures light from several directions. Because the lantern sits above the slope, the glass panels collect daylight throughout the day and push it deeper inside the room.
2. Enhanced Sense of Height
Rooms with sloped or vaulted ceilings often feel more open when a lantern is installed. The raised glass frame draws attention upwards, creating the sensation of greater space.
3. Distinctive Architecture
When you integrate a roof lantern on pitched roof structures, you instantly add architectural interest. The lantern becomes a feature that improves both curb appeal and interior character.
4. Better Airflow
Many lantern models include vents. When you fit a roof lantern on pitched roof surfaces, these vents can improve airflow even more due to the natural rising of warm air inside the room.
5. A Stunning Interior Feature
Few features can compete with a central lantern that brings light into a living room, kitchen, or converted loft space.
Key Points to Plan Before Installing a Roof Lantern on Pitched Roof Systems
Installing lantern glazing on a sloped roof requires thoughtful preparation. Below are important details to consider.
1. Match the Lantern to the Roof Angle
If you plan to place a roof lantern on pitched roof structures, the roof angle must be compatible with the lantern frame. Important considerations include:
- Whether the roof pitch requires a custom upstand
- How rainwater will drain around the lantern
- Whether the lantern model can sit level on a sloped base
Choosing the right style ensures both performance and aesthetics.
2. Check the Structural Support Capacity
Adding a roof lantern on pitched roof areas increases structural load. Glass, aluminium frames, supporting timbers, and reinforcement all contribute to weight. A structural engineer may recommend:
- Strengthening rafters
- Adding horizontal supports
- Integrating steel for large openings
This step is essential for long term stability.
3. Waterproofing and Flashing
Waterproofing is one of the most important elements when fitting a roof lantern on pitched roof structures. Flashing must guide water away from the lantern frame so moisture never gathers near the installation.
Common flashing methods include:
- High quality lead
- EPDM flashing
- Aluminium flashing kits
Good waterproofing ensures the lantern remains leak free even in heavy rain.
4. Focus on Thermal Efficiency
Energy performance is essential when installing a roof lantern on pitched roof areas. Look for:
- Low U value glazing
- Warm edge spacers
- Thermal break aluminium
- Solar protection coatings
Choosing products that match the standards of Skylights Roof Lanterns helps keep your home comfortable all year.
5. Plan the Interior Layout Around the Lantern
Because a roof lantern on pitched roof openings allows more directional light, room layout is important. Consider how daylight will fall on seating areas, dining tables, or kitchen counters. In some rooms, blinds or solar control glass may be useful to prevent glare.
Installation Tips for a Roof Lantern on Pitched Roof Surfaces
To secure long lasting performance, follow these professional installation guidelines.
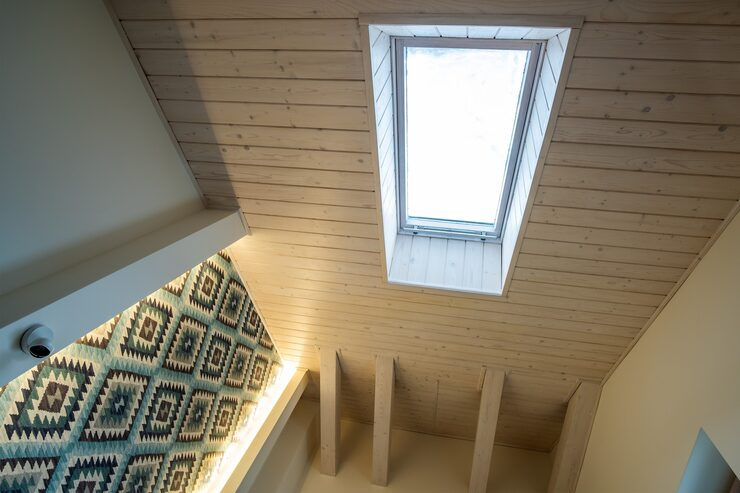
1. Build a Level Upstand
Although the surrounding roof is angled, the lantern must sit level. When adding a roof lantern on pitched roof structures, a custom upstand ensures:
- Proper drainage
- Secure lantern seating
- Better insulation
- Longevity of waterproofing
The upstand plays a major role in the final performance.
2. Reinforce Roof Rafters
Cutting a pitched roof to install a lantern changes the roof’s load path. Reinforcement is essential when creating an opening for a roof lantern on pitched roof areas.
Rafter reinforcement often includes:
- Doubling rafters
- Adding support beams
- Including steel lintels for large spans
This prevents the roof from sagging or shifting.
3. Select Pitched Roof Compatible Flashing
Flashing for flat roofs cannot be used when installing a roof lantern on pitched roof structures. The flashing must match:
- Roof angle
- Roof tile type
- Water flow direction
Correct flashing prevents leaks and protects the home.
4. Maintain Proper Drainage
Even though a roof lantern on pitched roof installations sits level, the surrounding slope must encourage water to flow freely. Poor drainage can lead to moisture problems, so ensure that tiles or roofing membranes are aligned correctly.
5. Consider Ventilation Features
If you choose a lantern with opening vents, airflow improves dramatically. Vent options for a roof lantern on pitched roof placements include:
- Manual vents
- Electric controls
- Rain sensors
- Remote operation
Better airflow reduces indoor humidity and improves comfort.
Design Inspiration for a Roof Lantern on Pitched Roof Homes
If you are exploring ideas for your own home, here are examples of how a roof lantern on pitched roof designs can enhance different spaces.
1. Kitchen Extensions With a Vaulted Ceiling
Placing a roof lantern on pitched roof kitchen extensions adds brightness and a more open atmosphere.
2. Loft Conversions
Lofts often lack natural light. A roof lantern on pitched roof structures in a loft can completely change the space.
3. Gable End Designs
A central roof lantern on pitched roof gable extensions creates balance and symmetry.
4. Traditional Properties
Adding a roof lantern on pitched roof surfaces in older homes creates a blend of heritage style and modern comfort.
5. Large Living Rooms
A well placed roof lantern on pitched roof living areas brings consistent daylight into large, open plan rooms.
See also: How the WPS Official Website Supports Remote Work Environments
Why Choose Skylights Roof Lanterns
Skylights Roof Lanterns sets a strong standard in the glazing market by offering:
- Robust aluminium frames
- Clear, high performance glazing
- Thermal efficiency
- Sleek modern designs
- Reliable durability
Their systems are well suited for both flat roofs and for anyone wanting to install a roof lantern on pitched roof structures.
Common Mistakes to Avoid
When installing a roof lantern on pitched roof surfaces, avoid:
- Using flat roof flashing
- Failing to reinforce rafters
- Selecting the wrong lantern size
- Ignoring the roof pitch angle
- Overlooking solar gain
- Building an uneven upstand
Avoiding these mistakes ensures a smooth installation.
Conclusion
Integrating a roof lantern on pitched roof designs is an excellent way to add brightness, height, and style to any home. With modern lantern systems becoming more adaptable, homeowners can enjoy the beauty of overhead glazing even on angled roof structures. With proper planning, expert installation, and high quality products like those from Skylights Roof Lanterns, your home can gain a striking architectural feature that lasts for years.
Contact Us
If you need guidance, product information, or support with installing a roof lantern, contact us today.